> For the complete documentation index, see [llms.txt](https://ta-product-labels-and-badges.tech-arms.io/llms.txt). Markdown versions of documentation pages are available by appending `.md` to page URLs; this page is available as [Markdown](https://ta-product-labels-and-badges.tech-arms.io/badge/inventory-text-badge.md).
# How to create an Inventory Text Badge
The inventory badge displays real-time stock levels to attract attention and encourage quick purchases, especially when stock is low. This guide will show you how to configure it step by step.
{% hint style="info" %}
**Note:** Before creating a badge, make sure the app is embedded into your theme. Otherwise, your badge won’t be visible on the storefront.
{% endhint %}
## Step 1: Set up your badge
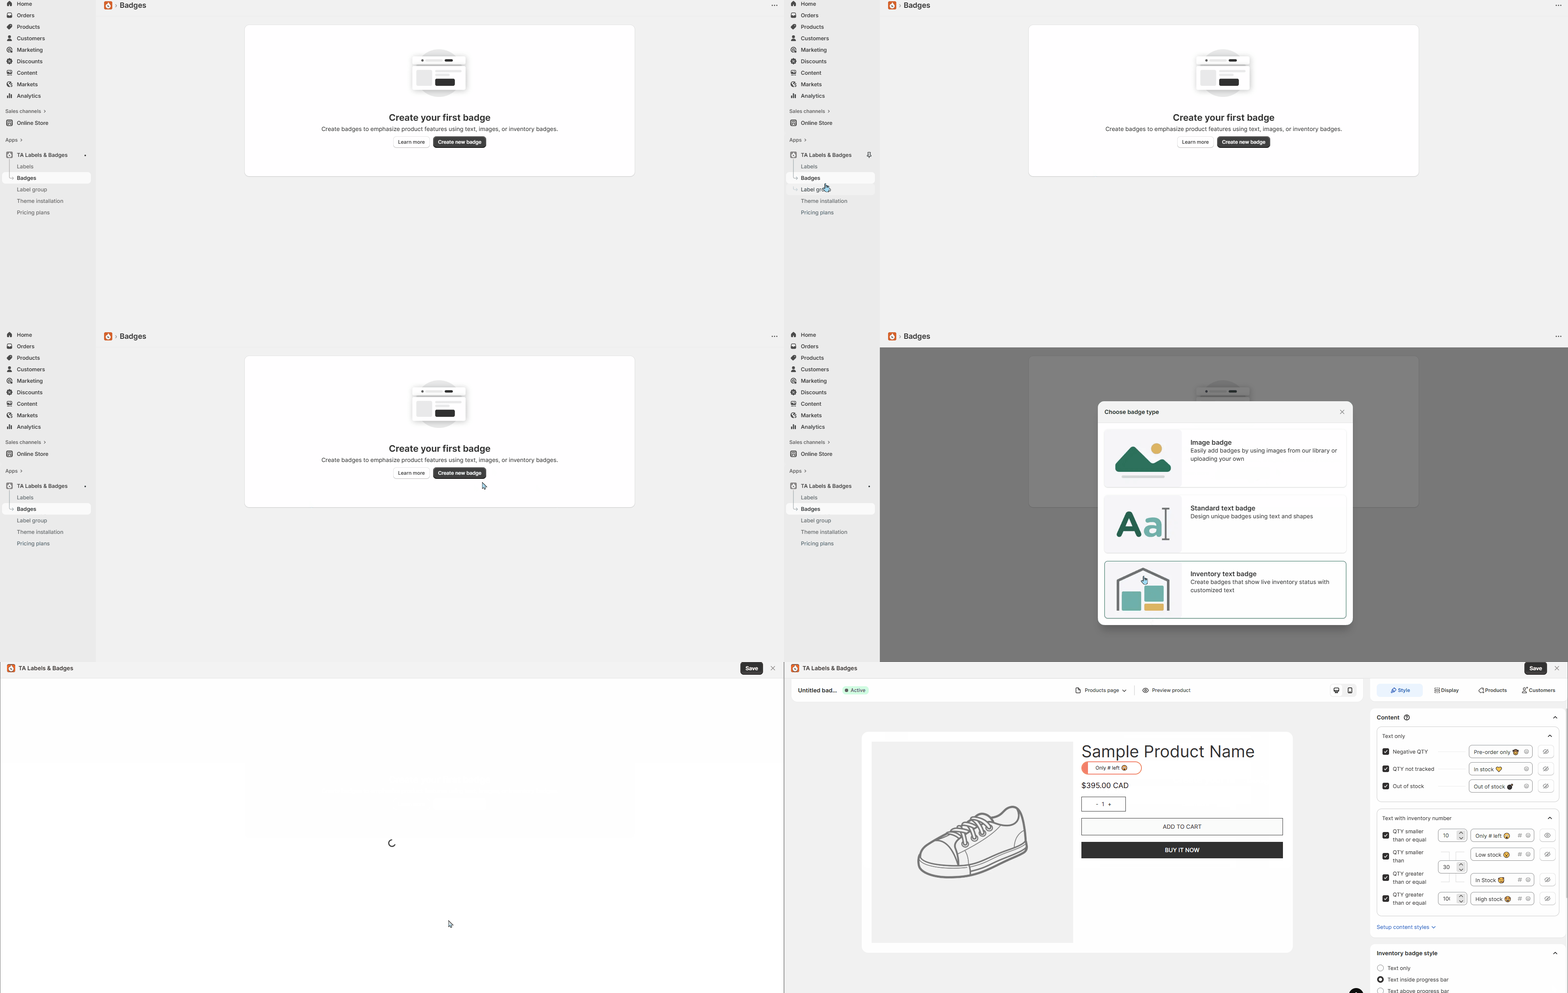
1. Navigate to **Badges** → Click **Create New Badge** → choose **Standard Text Badge**
2. Enter a name for your badge (Click to rename)
## Step 2: Design your Inventory Badge
1. **Add your content:**
Here, you can customize the badge text based on stock quantity, such as out of stock, negative quantity, or quantities that are greater than, smaller than, or equal to a specific value,...
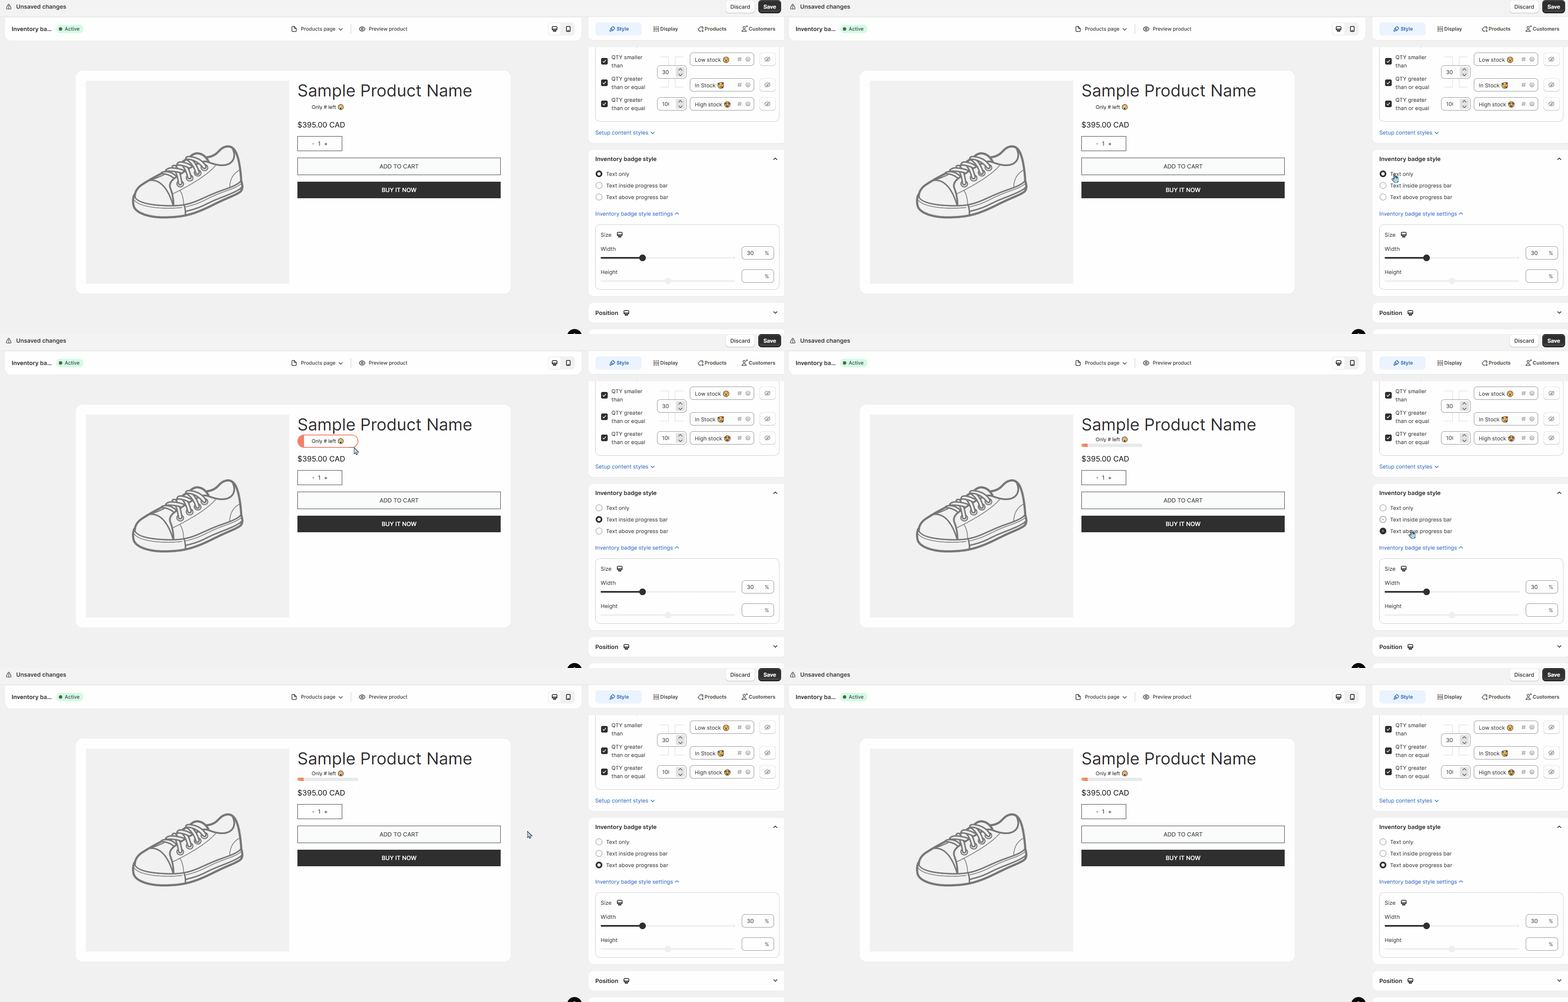
2. **Choose the badge style:**
You can choose between three styles: text only, text inside the progress bar, or text above the progress bar. The progress bar visually represents your stock level.
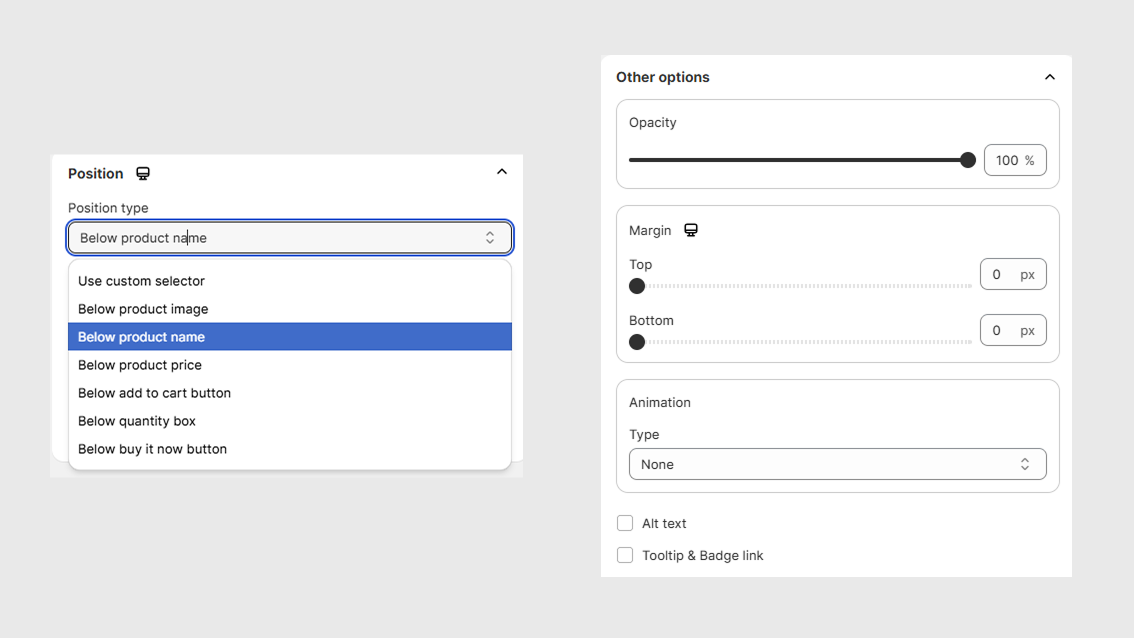
3. **Adjust badge size, position, and other styling options.**
You can customize the badge position along with margin, opacity, animation, and other style settings here:
## Step 3: Set Display conditions
In this section, you can control which pages the label appears on, how long it shows, which label displays first, and whether it’s visible on mobile or desktop devices.
## Step 4: Set Product Conditions
In this section, you can choose which type of badge to display based on conditions such as product availability and status, price and discount, all products or specific products.
1. Navigate to the Products tab.
2. Click on **Add conditions to select products** to select the products where you want the badge to appear.
3. Click **Search Product** and **Add Products** if needed
**Note:** Explore full options in our [Product Conditions](/setup-conditions/product-conditions.md)
## Step 5: Set Customers Condition
In this section, you can set conditions to define who can see the badge. You can also choose where to display the label based on the store language or the customer's country.
## Step 6: Save & Preview
Click **Save** to apply changes. You can now preview your badge directly on your storefront.
✨ That’s it! You’ve successfully created an Inventory Text Badge.
%20(1)%20(1)%20(1)%20(1).png?alt=media)
%20(1)%20(1)%20(1)%20(1)%20(1).png?alt=media)
%20(1)%20(1)%20(1)%20(1).png?alt=media)
.png?alt=media)
.png?alt=media)
.png?alt=media)
.png?alt=media)